Although the STANDARD and 1ROUT installations are successful, techniques or alternative approaches can still be employed to enhance the installation process.
We will share some of these insights here, as they may prove beneficial either as a supplementary method to the standard installation or as a revised approach.
It is important to note that, as with any installation methodology, it is highly recommended that a few test installations be conducted before implementing any changes. This will help you better understand the process and enhance your confidence in the decision.
We will also delve into greater detail regarding the setting of the router bit depth to address deep concaves.
If you have any questions, please do not hesitate to contact us. We are here to assist you.
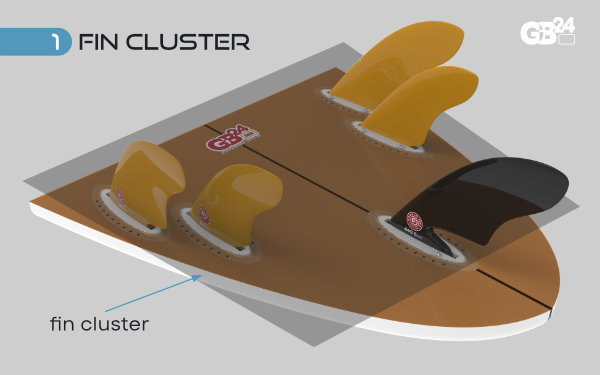
Pre-glue Boxes
Pre-gluing the boxes can simplify the installation process.
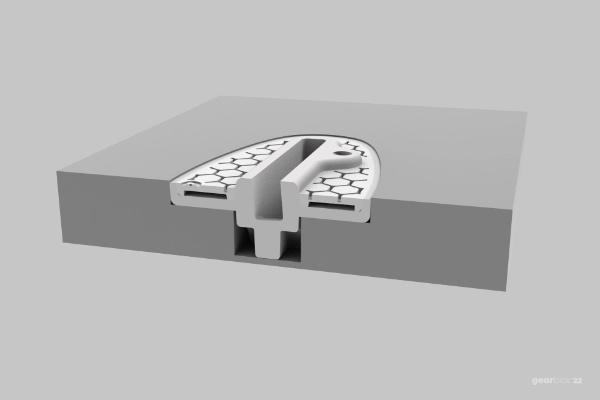
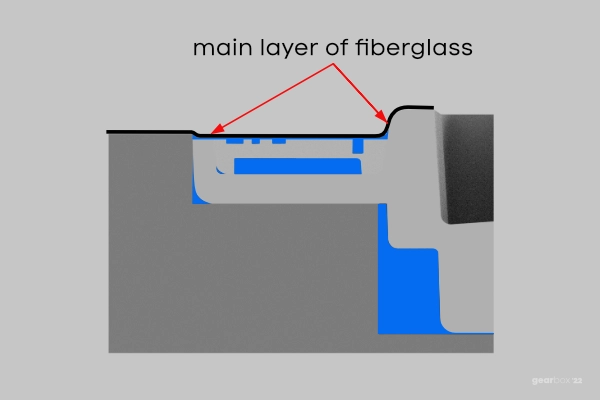
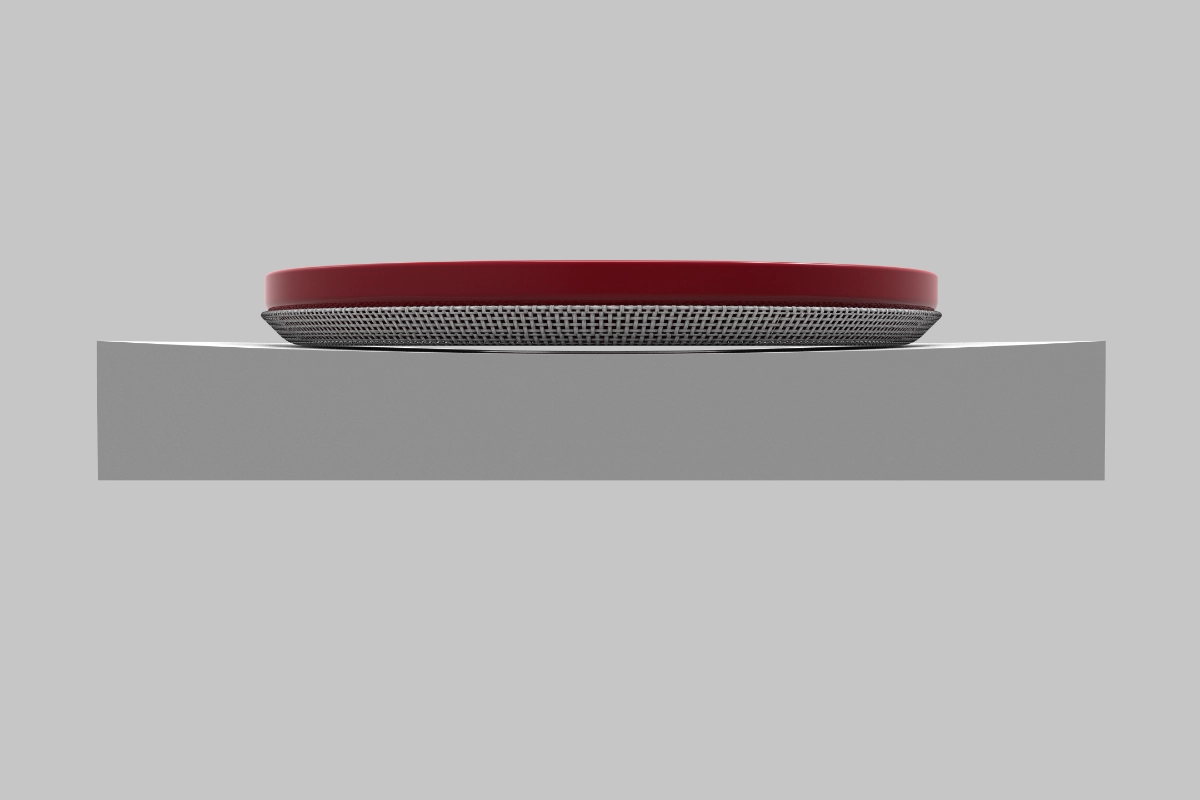
The illustration shows how the box would sit in the cavity during a standard installation. Ideally, it should be slightly below the bottom of the board. More on this later!
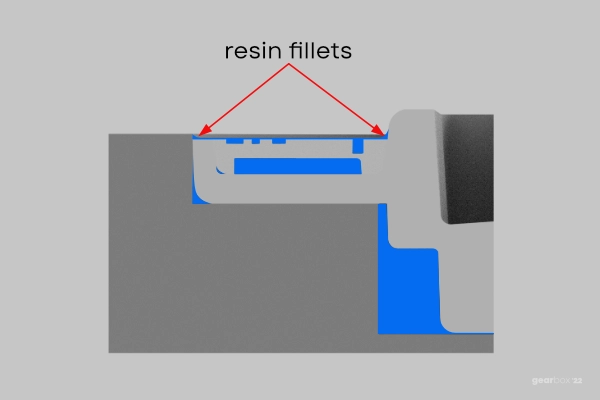
The motive for pre-gluing the boxes into the cavity is twofold. First, it is a lot less stressful and gives you the time to get everything set up perfectly (for those that prefer to have a fin in the box to check the cant angle, it makes that more accessible). Second, it means a coat of resin can be applied over the top of the cover, filling in the hex grooves and creating small curved ramps against the dam and outer edge of the cavity. See the detailed image below.
To pre-glue the boxes, the routed cavity is covered with resin, as is the underside of the box. Then insert the box into the cavity and allow any excess resin to squeeze out. Next, using a brush, spread the resin over the cover and the lower edge of the dam. Due to the nature of the resin, it will create a small fillet at the dam and the outer edge of the cavity. This makes it much easier for the cloth to drape over the box. This is one of the main reasons the box should sit slightly below the lip of the cavity.
The illustrations above show how this works step-by-step.
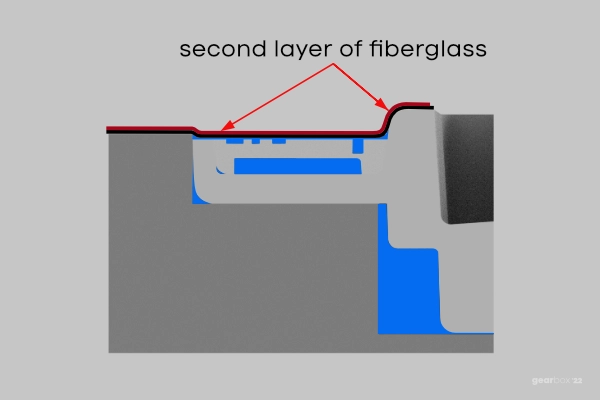
Another reason to set the box slightly below the cavity edge is that this technique allows the bottom lamination and reinforcement layers to drape more easily over the box cover.
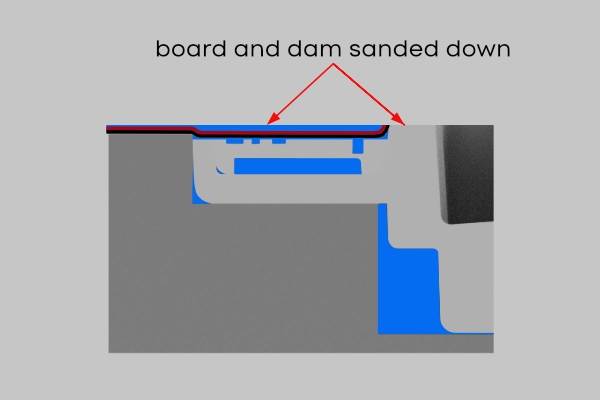
This is important because if the box were flush with the bottom of the board, there would be a greater risk of sanding through the lamination or, at the very least, grinding away the second reinforcement layer. By lowering the box, the cloth ends up slightly below the bottom of the board, making it much harder to sand through the layers.
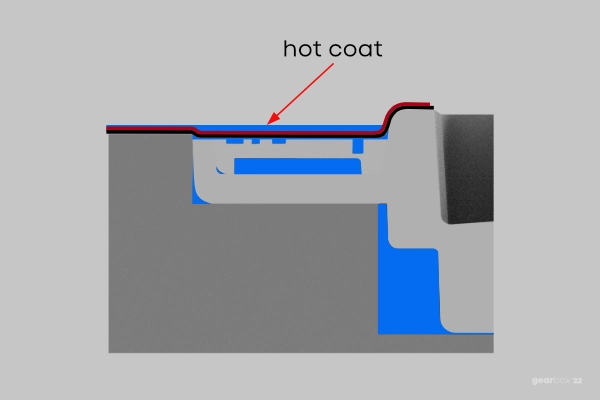
Once the boxes have been glued in, lamination can proceed, or if it is a post-lam install, the reinforcement layers can be applied. The gelled resin used during the gluing process makes pressing the cloth tight against the box very easy, as the resin will still be tacky. This will help hold the fabric in place while laminating.
It is essential always to place the SECOND reinforcement layer ON TOP of the bottom (or first) layer. The reason is that sanding through the bottom layer is less risky, which would be very easy at the edges of the reinforcement layer if it were underneath the primary layer.
Given the dam’s shape, this process ensures a clean installation with little to no air around the base.
Sectional view of the box in the routed cavity
Box glued is showing the resin fillets
The first primary layer of glass is applied over the box
The second layer of glass applied
A hot coat is applied over the glass
Finished installation with the board sanded down
Deep Concave Installs
When installing boxes on a board with deep concaves, an extra precaution must be taken to ensure the boxes are installed cleanly.
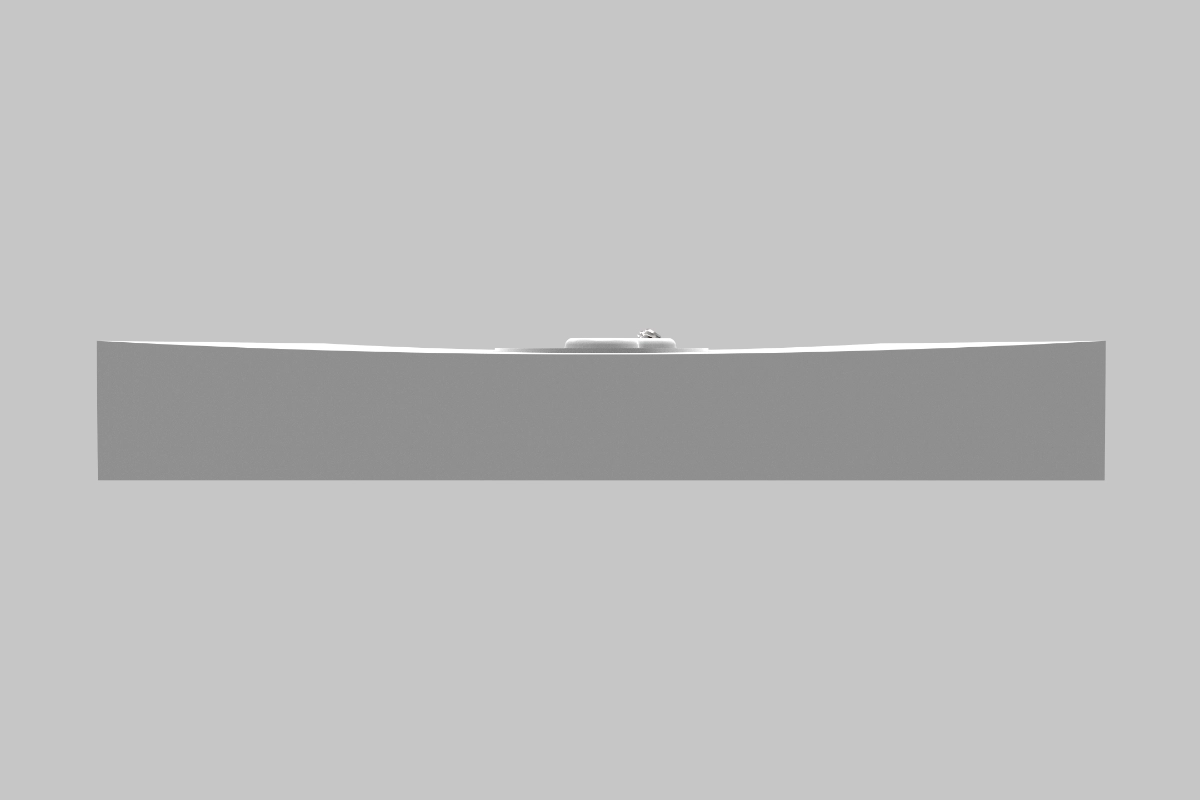
When the router jig is placed on a deep concave, it can bridge the concave, as shown in the illustrations below. When this happens, the box will not sit flush.
For this reason, the depth will need to be deeper by the amount of bridging. The aim is to get the box to sit slightly below the lowest part of the concave. The depth gauge will not provide enough depth due to the concave.
Generally, working with normal concaves takes about an extra 1/32" / 0.5 mm of additional depth.
Always do a test run to check that there is enough depth.
The illustrations below show what things will look like with a standard rout and the compensated-depth version.
Router jig sitting on a deep concave
When installing a board with deep double concaves, extra precautions must be taken to ensure the boxes are installed cleanly.
End view shows how the router jig spans the concave
When the base jig is placed on a deep concave, it can bridge the concave, as shown in the illustration above. When this happens and the STANDARD router depth is utilized, the box will not sit flush.
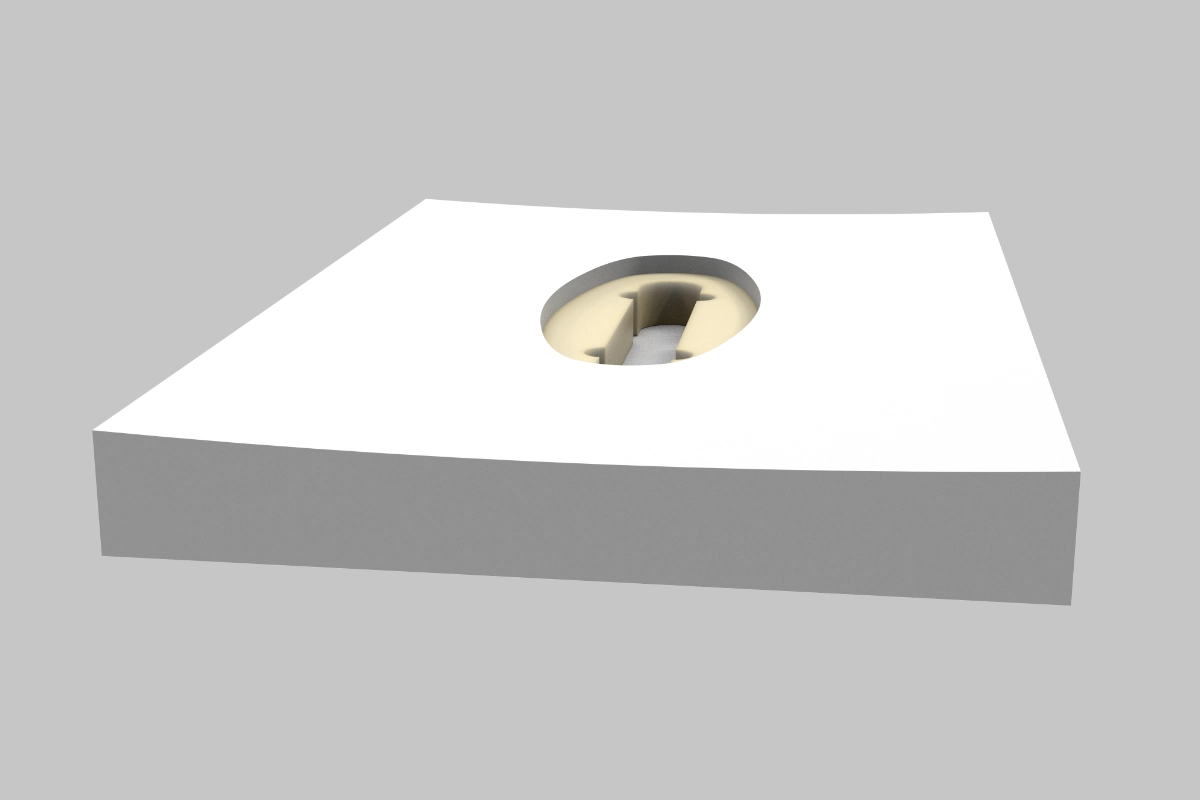
After routing with the standard depth, the box would end up sitting slightly above the lip of the cavity
Normal rout would leave the box sitting above the lip of the cavity
For this reason, the depth gauge provides a CONCAVE depth that sets the cavity deeper. The aim is to get the box to sit slightly below the lowest part of the concave. In some cases, the depth gauge might not provide enough depth due to the severity of the concave. Always do a test run to check that there is enough depth.
Box set slightly below the lowest lip of the cavity by utilizing a deeper rout
Using the CONCAVE depth on the gauge the box should end up slightly below the lowest lip of the concave. As shown in the above illustration.